Step-by-Step Guide to Installing Satin Vinyl Wraps - www.vinylcarwrapshop.com
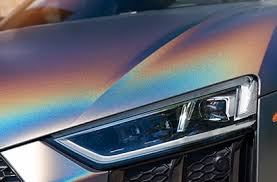
Satin Vinyl Wraps have become a popular choice among car enthusiasts looking to enhance their vehicle's appearance. With a smooth, semi-gloss finish that strikes a balance between matte and glossy, satin wraps provide a sleek and modern look. If you're considering installing a satin vinyl wrap on your car, this guide will walk you through the process step by step.
Step 1: Gather Your Tools and Materials
Before you begin, make sure you have all the necessary tools and materials. You will need:
- Satin vinyl wrap of your choice
- A heat gun or hair dryer
- A squeegee or application card
- A sharp utility knife
- Masking tape
- Microfiber cloths
- Surface cleaner or isopropyl alcohol
Step 2: Prepare Your Vehicle
Proper preparation is crucial for a flawless installation. Start by thoroughly washing your car to remove dirt, grease, and debris. Use a surface cleaner or isopropyl alcohol to ensure the surface is completely clean and smooth. Pay close attention to edges, crevices, and any areas where dirt may accumulate. Dry the car with a microfiber cloth before proceeding.
Step 3: Measure and Cut the Vinyl Wrap
Measure the area you plan to wrap and cut the vinyl accordingly, leaving a few extra inches on each side for adjustments. This ensures you have enough material to cover the surface completely and allows for trimming later.
Step 4: Position the Vinyl Wrap
Peel off a small section of the backing paper and align the vinyl wrap on the surface of your car. Use masking tape to hold it in place if necessary. Start at one end and gradually work your way across, peeling off the backing paper as you go. Avoid stretching the vinyl too much, as this can distort the material.
Step 5: Apply the Vinyl Wrap
Using a squeegee or application card, press the vinyl wrap onto the car's surface. Work from the center outward to remove air bubbles and wrinkles. Apply consistent pressure and use smooth, overlapping strokes for even coverage. If you encounter stubborn bubbles, use a heat gun to soften the vinyl and smooth it out.
Step 6: Trim Excess Vinyl
Once the vinyl is securely in place, use a sharp utility knife to trim any excess material. Be careful not to cut into your car's paint. Pay attention to edges, corners, and seams for a clean finish.
Step 7: Seal the Edges
To ensure durability, use a heat gun to gently warm the edges of the vinyl wrap and press them down firmly. This step helps prevent peeling and ensures a long-lasting application.(Green Car Wrap)
Step 8: Inspect Your Work
Take a step back and inspect your work for any imperfections. If you notice any bubbles or wrinkles, use heat and pressure to smooth them out. Make sure all edges are securely sealed.
Final Thoughts
Installing satin vinyl wraps can be a rewarding DIY project that transforms the look of your car. While it requires patience and attention to detail, following these steps will help you achieve professional-looking results. If you're unsure or want a flawless finish, consider seeking assistance from a professional installer.
For more tips and high-quality satin vinyl wraps, visit [www.vinylcarwrapshop.com](http://www.vinylcarwrapshop.com).